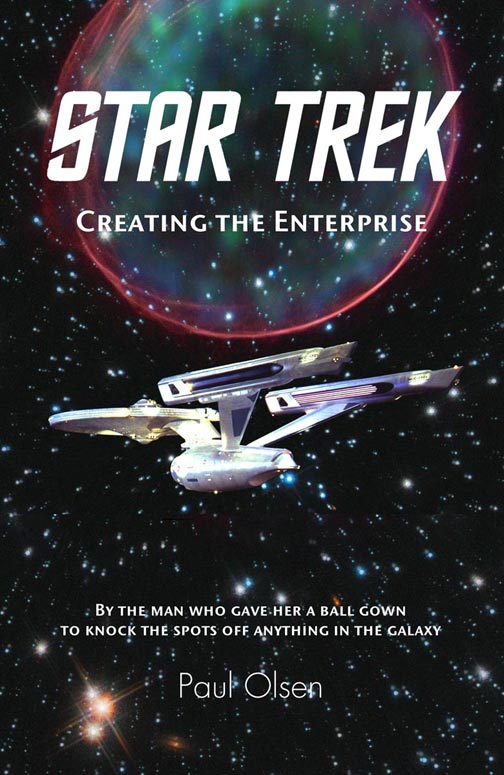
I am selling my RARE crew jacket...scroll to bottom of page

 Enterprise modelers...scroll down for complete painting details on your model

STAR TREK: THE MOVIE


IT'S NOT LIFE AS WE KNOW IT, JIM


I had been in LA for two years hanging out with Peter Lloyd, Ed Scarisbrick, and Bob Hickson...who, along with a few others, were easily the world's greatest illustrators (I'm writing a book about that wonderful period called "Airbrush"). These guys possessed frightening talents...they were impossibly good.

Ed shared a studio on Santa Monica blvd. with the great Charlie White, who pretty much started the whole LA airbrush "chrome look" revolution on his own. Charlie had gone to school with a guy named Jim Dow, who had a "miniature" (model-making) facility on the east side of Las Palmas avenue just north of Santa Monica called "Magicam" with two other guys who had invented a miniature/live-action camera tracking system that was best demonstrated on the Alexandria Library segment of the Carl Sagan "Cosmos" series (with me, so far???). Magicam had the contract to build the Starship Enterprise, the Klingon battleship, and various other space stations, etc.

"Uhh...what is it you do, exactly?"

"Oh, I build spaceships, space stations....that sort of thing."

You can see why I love the movie business...it's nuts.

Jim's modelmakers were making good progress with the Enterprise and it was about time to find someone to put all the finishing paint detail on this baby. Jim called Charlie and asked him if he knew anyone who was good enough to do it...most of the good airbrush guys had their own flourishing businesses and weren't going to take off six months for any kind of single project that would take up all their time. They wouldn't have a freelance business at the end of it.

Charlie said he might be able to help, and walked into Ed's cubicle and said, "Don't you know an airbrush guy who is looking for work?" Ed said he did, Charlie gave Ed Jim Dow's number and Ed called me, which became the single most incredible phone call I have ever received in my life:

BRRRRRINNNNGGG! "Hello?"

"Paul, it's Ed......how would you like to paint the Starship Enterprise?"

There was only one answer to THAT question. I will always be indebted to Ed for that one wonderful phone call...it got me the greatest gig going, and shoed me into the movie business.

I nervously made my way into Hollywood from my Richie Valens house in Silverlake, walked into Magicam and sat down in front of the affable and aptly-named Jim. He looked at my work, said, "I think you'll do fine, Paul," and followed that up with, "Come with me." Jim rose, walked down the hallway to the large spray booth on the right and opened the door, ushering me in.

I've never been a Trekkie, but I was looking forward to what I was about to see, the Starship Enterprise in the flesh. I followed Jim down the hall and into the large spray booth which was completely taken up by the Enterprise. She had no clothes on and looked like a virgin, beautifully sprawled out in her private suite with her wings spread, ready for me to have my way with her. I was excited, but I was also just a little apprehensive; it was up to me and me alone to design and make a ball gown for this lady that would knock the spots off anything in the Galaxy. I had better be as good as I thought I was.

I began to wish I had airbrushed a few racing cars, crash helmets or motorcycle gas tanks to be familiar with painting a dimensional 'thing' rather than a piece of illustration board specifically made for the purpose of receiving inks. I could do this (couldn't I?). It was too late now, I was 'in'. My artwork has always been 'dimensional'---trying to fool the eye on a two-dimensional surface...now I was confronted with the real thing and it was a very expensive, one-off, custom-built Real Thing worth 350 grand that was the centerpiece of the whole movie in the bargain. So it was really worth millions.


Gulp.


Every inch of my handiwork was going to be scrutinized by camera shots just inches away from the surface and then blown up on huge screens all over the world to be further scrutinized by thousands of meticulous Trekkies all over that world. Since the director, the very charming and dauntingly talented Doug Trumbull, had not yet worked out his sequence of shots and camera angles with Tom Cranham, the illustrator (who became one of my best friends), every inch of the Enterprise had to be perfect. PER-R-R-R-FECT. I used the new pearlescent lacquers which had just come on the market and the Enterprise looked like an opal when finished. After the lighting crew spent three days rigging the lights on a strictly closed set, they proudly held an unveiling which took everyone's breath away, including mine. Doug was beaming and gave me a broad smile. The centerpiece was ready, all we had to do was get the rest of the effects together! I worked on the film for a year-and-a-half and it was hard work, long hours and great fun with a wonderful director and crew....a 65-strong family who are all still friends 27 years later, scattered over the globe we may be.

Painting the Starship Enterprise was pure pleasure and I worked with exceptionally skilled people who were making the craziest things for the film.

A Czech girl named Zuzana Swansea who had escaped just in front of the Russians (and I mean JUST in front) when they invaded Prague in the spring of 1968 had made a clever start on the design of the surface of the "dish" of the Enterprise (she divided it into panels which had an Aztec-inspired motif), but who lacked the airbrush skills necessary to pull it off, graciously handed over the keys to the Queen of the Galaxy, and I spent days sitting in the room with the Enterprise trying to figure out the best way to paint her.....what sorts of paint to use, and where to start. It was just a little daunting. The modelmakers helped me a bit on the last one because they were still working on the main hull of the Enterprise, so I was limited to the dish for openers.

I decided to use the new pearlescent lacquers that were just being made available, and this turned out to be the perfect choice...especially for an essentially "white" ship. The Enterprise was eight feet long, with a skin made up of five different types of plastic molded and formed around a skeleton chassis which was made by a custom-aircraft fabrication facility using aircraft-grade aluminum struts which were heli-arc welded together. She had cost well over a quarter of a million to date.

Because the Enterprise was such a goofy shape for Earth-bound engineering and physics (the huge dish suspended out in front of the fuselage by only a thin vertical wing, with large engine nacelles also supported by thin pylon wings) this baby had to be put together with the strongest materials and methods available. It was just as well it was over-designed, because I banged into the dish with my head many times in the course of the eight months I worked on her. When this happened, the whole ungainly ship would twang from end to end, the engine pods would twist back and forth and I would freeze, waiting for something to crash to the floor (like an engine pod or the dish itself...in which case Plan B would take effect immediately: a run for the border!).


WHAT NOW!


I worked alone on the Enterprise in the spray booth for about two months at Las Palmas, whilst Mark Stetson, Chris Crump, Tom Pahk, Chris Ross, Rick Thompson, Lee Ettelman, George Trimmer, and Russ Simpson worked in the huge model-making room behind me...and every morning we played Jimmy Buffet's "Changes in Latitudes, Changes in Attitudes" album over the PA...."ex-patriot Americans-s-s-s......." Great song. Right....where was I? Oh! Yes, then after about two months we moved the Big E a few blocks away to a weird warehouse facility at 1146 Seward that doubled as a cab garage, or something where Ron Gress joined us and helped prepare the surface of the Enterprise for me to paint as well as painting the engineering section. Ron had just invented an airbrush he aptly named the "Chameleon" that could hold up to 8 colors and you could mix from one to the other on the fly, and sold the idea to Binks. If you are in Hollywood and you go to 1146 Seward, we were right behind the barred grille window on the right side of the building...that was our little room to work on the Big E. Joining us there was Bruce Bishop, Kris Gregg, Chris Elliot, Dennis Schultz, Dick Singleton and Joe Garlington. I worked mainly with Mark Stetson, Ron Gress, Chris Elliot, and Bruce Bishop. We all got on great.

We were at Seward for maybe six weeks (where the above photo was taken) and then we all moved to the huge facility and shooting stage on Maxella in Marina Del Rey (now torn down to be replaced by a complex of townhouses) where Jeffrey Katzenberg's new Porsche was stolen from our parking lot!

Mark, Chris Ross, Chris Elliot, Ron Gress, Bruce Bishop, Chris Crump and myself decided to crash the Enterprise set at Paramount one day. We gave the receptionist some jive about needing to see the set as we were designing effects and moxied our way onto the lot. I've seen plenty of sets, but the Enterprise set was magic, with hallways leading in all directions and forced perspective employed convincingly in the engine room. I sat back in Captain Kirk's chair and with just a little a bit of imagination.......

The bridge was fun, but the most interesting bits were the engine room and the medical ward.

By-the-way, Mark Stetson received an Oscar as effects supervisor on Lord of the Rings.

Zuzana had some slides she took in Prague while the Russian tanks were invading...how she had the presence of mind to stop in the middle of the road and take pictures in that situation is beyond me. Doug Trumbull, the effects director, wanted to see them. He blew them up on the large screen in the facility's little theater, and in one of the slides we spotted a Russian soldier standing up in a tank with a machine gun pointed straight at her camera and shooting at her. She didn't even know this had gone on until we saw the slides blown up so large 11 years later and could make out all the detail. She went home VERY shaken.

We moved the half-finished Enterprise from Hollywood to the new effects facility Doug Trumbull had just taken over in Marina Del Rey. I remember thinking, as we followed the Enterprise being transported across town in a specially-rigged truck for transporting fragile machinery, that we knew what was inside that truck, but to anyone on the street it was just a truck. Little did they know the Enterprise was cruising past them on a cushion of air. The new facility was buzzing with creative juices and was a great place to work. I worked seven days a week, 14 to 16 hours a day along with everyone else to get this monstrous project finished (all the principal live action photography had already been shot on the Enterprise stage at Paramount). The building was two large factory buildings knocked into one, with the offices in the front, the small theater to the left, the model room just behind the offices, and the rest of the cavernous space taken up with shooting stages all cloaked in black with long sets of camera rails (like train tracks the camera platform moves back and forth on). Lights, cameras, stands, computers, models, snaking electrical cables and all the related bits and pieces necessary for effects photography were scattered everywhere, with people working quietly and energetically in all parts of the building.

What a great buzz.

When the Enterprise was nearly finished, some yokel tripped a wrong circuit (the model was wired with scores of circuits that lit various navigational lights and interior lights built into it)...I'm convinced it was Michael Eisner showing it off to his girlfriend.....but that's only an EDUCATED guess---I could be very wrong (is there a difference between "very wrong," and just "wrong"???)......and shorted something out. Some circuits caught fire and melted the wiring. The wiring damage had to be repaired. This required major surgery and held up the completion by two months.


LEFT:
The parts of the model I wasn't spraying were covered up with Handiwrap. I'm using one of the myriad friskets (stencils) I cut out of acetate for the various panels and patterns on the surface to give the model "scale." RIGHT: You can really see the colors pearlesce here, but what you can't see are all the different colors they were, and how they changed as your angle of view changed. It looked beautiful.


One bonus of using laquers was that the thinning medium (laquer thinner) is also the solvent for the dried paint...so the airbrush was a self-cleaning instrument and never clogged or spattered (as they can certainly do....usually just when you've finished an illustration!).

Luckily, everyone else was having similar problems with their end of things while Doug's hair was turning grey being the man in the middle between us and the producers, so our problems didn't hold up the shooting schedule any more than anyone else's. There were four of us cooped up in one little room (three model makers and me) all working on the Enterprise, trying not to trip over each other. We all got on extremely well, considering we were working such impossible hours. There was never a hint of a cross word. Lots of giggling, though!


An English actor friend with the unlikely name of Peter Jolley came over to L.A. and met me at the effects facility. We popped down to the beach at nearby Venice for lunch and a six-pack. It was cold and foggy, so there was no one about but two attractive girls sitting on a blanket just twenty feet from us.

As we drank and chatted Peter grabbed my sleeve and said, "Uh, Paul, look over there."

The two girls began making love with each other, slowly peeling off their swimsuits in the process, perfectly aware of us watching them and enjoying the show. Peter said, "Paul, this is ridiculous. Do you realize that this is my very first day here in L.A. and what happens? I get off the plane and am taken straightaway to see the Starship Enterprise. Then we come to Venice beach and see two girls making love with each other! How can I tell this to my friends back home? They just won't believe me! They'll just say, 'Oh, sure, Peter, pull the other one!'" Dear Peter committed suicide some years later, depressed at seeing what was possible, but not being able to grab the brass ring. I now think his wonderful experiences in LA may have been a small contribution to his feelings of hopelessness, which saddens me. Here's one for you, Peter. Everyone deserves at least a small piece in history.

When I finished the ship and all the decals were applied over my painstaking paint job (very nerve wracking), it was wheeled onto the shooting stage which was cloaked with black velvet everywhere to be completely non-reflective and drop out any background when it was shot. It took the lighting wizards three days to set up the lights on the closed set and when they had everything just the way they wanted it, Doug invited us onto the stage and had the model lit on his command.

Everyone gasped...including me....she was beautiful.

The Starship Enterprise looked as if she was made entirely of gleaming opal. I had been pleased with the progress of my work, but I had no idea the result would be so spectacular. Dear old Doug drew me aside with one of his big grins and said, "Paul, it's terrific, but we may have problems shooting it because I think we'll get light kicks off the edges of the model."

The model was so bright and so colorful that light flare against the black background she would be shot against would make it impossible to isolate the edges of the model from the background so a star field or planetfall or other effect could be photographically dropped (matted) in cleanly. They would have to shoot the model with low light, which would cool the reflections and all the model detail as well. There are still some shots where the opalescence can be seen, but the real thing looked so much better than can be seen in the movie. Pity.


The model could be attached from the bottom, the front, the rear, and one side. Various access panels would be removed and replaced.

The special effects production for the film entailed so much work that it was split between Doug's facility in Marina Del Rey and John Dykstra's Apogee outfit next to Van Nuys airport out in the valley. Doug and Con Pedersen had been responsible for all the effects on "2001" and Doug had developed the slit-scan technique that so stunned moviegoers during the last sequence of that film). Doug asked if I could stay on and work on some of the effects (which I was just learning about) and I ended up sharing an office with one of the most likable people in the film industry: Tom Cranham, one of the two top storyboard artists in Hollywood.

And that's the truth!


For all you model builders, here are some tips on painting your Big E:


If you would like your model to look as close to the real thing as possible, and are willing to put in the time---and it will take a LOT of time.....possibly two to four years if you work on it 10 or 15 hours a week (but if you are serious, the end result will be worth it), you'll want to paint the Big E exactly as I painted her.


The original model was 8 feet long and I would have thought it would take even more time to paint a smaller one.


First of all, the paints: the primer was a coarse, white, lacquer auto primer...none of us can remember the name of it, but it was a common primer we obtained from a local auto paint store meant to go on thick so it could be sanded, re-sprayed, sanded, re-sprayed, etc, until you achieved a perfectly flawless, smooth finish.


At any given time, there were two to four modelmakers sanding the plastic surface and making it perfect, as well as spraying and sanding various sections of the Big E, working ahead of me; so in terms of man-hours, I would say AT LEAST twice as many man hours went into the preparation of the surface than into my finish, which took me six months, working 5 to 7 days a week, upwards of 16 hours a day! Over the course of six months, I probably averaged 12 hours per day, 7 days a week. The actual job took 8 months because someone tripped a circuit and blew half of the electrics, and the model needed major surgery.


The engineering section was painted by Ron Gress, who used Floquil paints....a kind of matte, opaque, pale sage green color.


I found the pearlescent lacquer paints at a huge automotive paint store in Hawthorne, just south of LA, that sold to the trade and custom shops only. I can't remember the brand of the paints, but they were made by a specialty outfit who only produced these paints, because the labels were quite home-made. The paints came in 6 colors, in 8 oz. glass jars, and were $45.00 each in 1978! The paints looked milky in the jars, but were utterly transparent when sprayed, just giving a pearl-like luster to the undercoating---just like pearl fingernail polish today. So you can see where the quality of the preparation of the plastic surfaces and the undercoating is paramount (yuk-yuk). I bought four colors: red, green, gold, and blue. When I finished the Enterprise, I still had 2/3 of the paint left in all the jars.


Mark Stetson, who was in charge of all the miniatures, and helped prepare the surface of the Big E, just sent me this: "Paul, I remember I hated that plastic primer, and it was really grainy. It did stick, though. I remember we had to chase it out of the scribe lines between each coat. It had too much filler in it. Using common sense, I'd say that we both wet-sanded and dry sanded it, starting with 400 and finishing with 600. In some cases, when we got into areas where we knew the camera would get very close, we used that plastic sandpaper that goes down to 1200 grit. We used sanding blocks whenever we could to keep it flat. I still have my nifty little x-acto sanding block set of aluminum extrusions. And, I think, the same rubber automotive block I used during STTMP."


AIRBRUSH: You HAVE to have a DOUBLE-ACTION, internal-mix airbrush...a single-action one won't cut it...don't even think about it. In case you are unfamiliar with airbrushes, a double action airbrush has a top-mounted trigger that when pushed downwards, releases air into the tip, and when pulled back, retracts the pointed needle from the nozzle and allows paint to be gradually siphoned through. The airflow creates a suction to draw the paint from the bowl, cup, or jar. You essentially control the airflow with a pressure regulator in the air line (usually at the junction where you hook up your airbrush hose) and can then precisely control the paint flow by pulling back gradually on the trigger whilst the full airflow you have determined is correct passes through the brush.


I highly recommend the Paasche V-1, SIDE FEED airbrush...they are reasonably-priced, and very good airbrushes. You can drop them, and knock them about and they will not get harmed. Don't use a gravity-fed airbrush (with a built-in cup on top)...they are a pain the ass to use for all sorts of reasons. If you have an Iwata, or more precise airbrush, that's fine, but what I like about the Paasche is that you can get little color bottles for it. The beauty of that is if you have four bottles filled with the four colors, you can switch bottles back and forth endlessly and effortlessly...and trust me, you will be doing that all through the job. They slip in and out of the hole on the side where the paint cups go. You can use paint cups, too, but the paints will tend to evaporate, and you can spill them out of the cup. The bottles are much better. During the whole course of the job, I never had to clean out the bottles...the airhole in the top of the bottle cap would clog up once in awhile and that would need clearing out with a paper clip and some lacquer thinner, but that was about it. At the end of the day I would simply run some lacquer thinner through the instrument and it was clean and ready to go the next day.


You only need the smallest of compressors, any of which will have a regulator mounted on it. I recommend getting a separate regulator---they aren't expensive---that you can mount within easy reach of your work area. Also, you MUST wear a carbon filter rubber respirator and ensure you have adequate air flowing from behind you to carry off any fumes and overspray. Lacquer fumes are DEADLY. If you have built, or bought a small spray booth, then you can do without the respirator if you can't smell any fumes as you spray.


I can't remember the general air pressure I used, but it would have been between 20 and 35 psi. The higher the air pressure, the smaller the droplets....up to a point. Then things begin get messy because of the high rate of airflow against the model surface.


If you are not used to using an airbrush, they can be quite daunting. Just follow the instructions that come with it, and try it out with some inks on paper until you get the hang of it. The little tips at the very front usually need some adjusting in and out to get the correct airflow. Make sure the tip is kept clear of paint build-up. The beauty of working with lacquers is that the thinner is also the solvent, so the airbrush is constantly cleaning itself and will always work smoothly as a result. Also, the pearl paints will constantly "melt" into themselves, giving you a lovely sheen to your work....assuming the surface has been prepared perfectly! As you prepare the surface of the ship, think of what you are doing as applying the skin to a naked woman, with all her intimate details, and the paintjob as giving her a see-through outfit to wear over her perfect, bare skin, and you won't go wrong.


Try to find another piece of smooth plastic that you can prep with sanded primer, and practice spraying the pearl colors on that until you are happy with the results. Remember, you can ALWAYS spray more color, but you can't un-spray...so always lay your colors down sparingly and keep building them up. Don't try to cover what you are doing in one coat. Easy does it, bit by bit...that's the secret to using an airbrush for anything. You can't take back what you do unless you wipe everything off with lacquer thinner, and that will goop up the primer and make a right mess....that is NOT an option.


The colors I used were: red, gold, blue, and green....so those colors would have that color-cast when they pearlesced...but would also "flip-flop" to the complement of that color when you changed your angle of view...so they were always "moving" as you moved. Incredibly beautiful when the surface is broken up in various combinations and densities of these colors. The paints are completely transparent and just "cast" a color of pearl...so when the ship was finished, it looked like an opal or like it was made with mother-of-pearl. Stunning.


I would assume there are many more pearl paints out there now....and maybe they all work the same way by pearlescing in the main color, and then when the angle of reflection (incidence) is changed, they pearlesce towards the complement (the opposite color on the color wheel) of that color, "flip-flopping," so-to-speak, though I'm not sure if commercial "flip-flop" colors are the same thing...best to check.


As you know, the ship is broken into etched panels, and then it was up to me to further break those panels down into smaller, "human-sized" panels to give the ship scale. For that I spent a week cutting friskets (stencils) of every size and shape of square and rectangle, and curved rectangles for the dish, and lightning-bolt shapes for the engine pylons. I was limited to right-angle shapes because of all the etched panels...but where there weren't any, I was free to use other shapes (as in the pylons).


When I would illustrate an album cover, or any commercial job using an airbrush, I would always spend more time cutting friskets than spraying the job...because essentially, your stencils give you all the tools you need to paint, and it's important to get them right and spend time on them. I used 5 and 10 thousandths acetate sheets cut with an X-acto #11 knife. You need to keep the sheets relatively small because they have to bend over compound curves, which flat sheets of plastic don't like doing, of course. You could easily end up with 30 or 40 little sheets of plastic with various sizes of squares and rectangles cut into them. I also used "repositionable (low tack) Magic tape" for small, tricky areas. If you are working on a small model, I could imagine most of your frisketing would be with this stuff....very time consuming and tedious work.


Before I started on the model I tested the colors on scrap bits plastic to get used to them and how they would lay down. I freely admit to putting off for days making an actual start on the model---I was "testing!" Ha! I was scared stiff! I can admit it now.


I began to spray one panel with various shapes, using various colors, and overlay some of the frisket shapes so I would get layers of color, and also spray some friskets lightly, and some a bit more heavily for more density of color....by doing this, and going back and forth overlaying various friskets and spraying them, I would end up with infinite colors and densities and shapes. I wish I had kept those friskets! What a wonderful souvenir they would have been! But I used the same ones, cutting new bits I needed from time-to-time, for the whole model. I would have to clean off excess paint from time-to-time with lacquer thinner, laying them down on paper towels, and they would clean easily. Use cling-film to protect the bits you've sprayed with pearl.


The reason you don't see the bright pearlescence on the model in the movie is that the model was so sparkling, that when lit properly, there were too many light "kicks" off the edges of the model, and a clean matte could not be made to isolate the model from the studio background so a star background, or other background could be cleanly dropped in behind the model. Consequently, the model had to be shot in low light, which substantially lessened the effect of the sparkling pearl finish.


As to reference photos, you'll have to ask your model company or go digging aorund the web....I don't have any good close-ups of the Big E. If I knew then what I know now, I would have tons! The panels on the dish were an Aztec motif....you'll have to try to find a photo of it, as I don't have any close-ups and I can't remember it precisely. Each panel had the same Aztec design, but broken up in different ways with differing patterns and colors.
I was very impressed with the model-makers I worked with....how patient and detailed they were, so when they finished a part of a model it was absolutely flawless from inches away. Total perfection.


The blue parts of the model were already done in a kind of colored plastic insert before I got to the model.


The underside of the rear of the fusilage (I know it has a name, but I don't know what it is) was sprayed free-form with no friskets, using all the colors and going back and forth along the length of it in "rays" to make it look like energy was flowing from there.


When you are figuring out how to break up any area of the ship into panels, let the shapes you are working with guide you, and always think of jet aircraft. Imagine laying the metal skin on a 747 and how that would look...and when you get to complex shapes on the stern of the model, around the front, or on the engine nacelles, think of the jet engines and the pylons that hold them. Go out to an airport and have a look at jet planes to see how those complex shapes are covered with metal skin. That's what I did....I drove out to LAX and took tons of photos of aircraft to understand what was going on. That will be a little tougher to do these days, but you can take pictures from an airport lounge. I highly recommend you do this, if you can. It will give you a good visual foundation on which to build as you bring your beauty to life.


What I loved about the way the artists up at ILM broke up the skin of the ship on the second movie was that they worked with smooth surfaces, which gave them carte blanche to use more "alien" breakup techniques...a more advanced form of construction....but this model forces you into more familiar kinds of shapes, which is why I used the pearl paints to give it that "advanced" civilization, techy look. If it was going to look like "familiar" construction, so the mind would see it as a spacecraft (understand the panel breakup), I wanted to give it something extra that would make it "advanced."


Good luck! Just remember to take things slowly and bit-by-bit, and you won't go wrong. You can always go back and build up areas you think need it....just keep laying on the colors until you are happy with the result! You are the artist on this one....you can make it what you want!

Powered by WebRing.

For more info on this and other spaceship models, click here to go to starshipmodeler.com:


Right...now to the jacket:

$3,995

a copy of my ebay ad:

Click on any photo to enlarge

If you are seriously interested in my jacket, please email me: paul@olsenart.com
Thanks!

home